Player's Guide
Want to know what an item or key item does? Want to know what there is to do in a location under any conditions? Want to learn any of the quirks about this game’s spells and battle system? Use Ctrl+F in here to your heart’s content! Old and new players of SMRPG alike may find something useful in here.
Contents
- Basic Info & Getting Around
- Battling
- Spells
- How Does This Boss Work?
- Leveling Up
- Getting Items & Equipment
- What Equips Do
- What Regular Items Do
- What Key Items Do
- Where Key Items Are
-
What Can I Do In This Town?
- Area 1 (Mario's Pad, Mushroom Way, Mushroom Kingdom, Bandit's Way)
- Area 2 (Kero Sewers, Tadpole Pond, Midas River, Rose Way, Rose Town, Forest Maze, Pipe Vault, Yo'ster Isle)
- Area 3 (Moleville, Booster Pass, Booster Tower, Booster Hill, Marrymore)
- Area 4 (Star Hill, Seaside Town, Sea, Sunken Ship)
- Area 5 (Land's End, Monstro Town, Bean Valley, Grate Guy's Casino)
- Area 6 (Nimbus Land, Barrel Volcano)
- Area 7 (Vista Hill, Bowser's Keep, Factory)
Basic Info & Getting Around
The open mode randomizer starts off with the majority of map locations unlocked. You must find all the Star Pieces, guarded by random area bosses and mimic chests (and the empty space on Star Hill), to unlock the final dungeon and complete the game. Some boss fights are locked behind Key Items (progression items).
Most cutscenes and text are removed. You do not do the initial version of Bowser’s Keep at the start.
You start off in Mario’s Pad with 3 characters, and can recruit 2 characters by completing Forest Maze and Marrymore. You can use up to 3 characters in battle at a time.
This game is a platformer-rpg, and there are no random encounters. Most areas have platforming/navigation segments with enemies scattered throughout; collide with an enemy to start a battle or dodge them to progress.
This guide will sometimes reference “frame windows”. SMRPG is a 60 FPS game, so a 3-frame window for instance would be a 1/20th of a second time interval in which an input can be accepted.
You can only save your game by jumping onto a Save Box. These are available in all inns, and are also scattered around the world generously.
Battling
Command Selection
Your characters have 4 options: A (regular attack), X (items), Y (magic attack), or B (defend or run).
Y-attacks require FP (Flower Points, this game’s version of Magic Points). In SMRPG, Flower Points are shared between your entire party, individual characters do not have their own reserves of FP.
Damage Calculation
All damage is calculated based on the following values:
- Fighter’s attack (or magic attack) and target’s defense (or magic defense)
- Inherent base power of the weapon or spell/special attack being used
- Whether or not the target is in the Defend state
- If the fighter has an attack boost multiplier status (1.5x given by Geno Boost, Energizer, etc… 0.5x if Fear status is inflicted) and if the target has a defense boost multiplier status (2x if given by Geno Boost, Bracer, etc… 0.67x if the Fear status is inflicted) - note that 1.5x attack and 0.67 defense do not stack.
- If the attack does elemental (Ice, Fire, Lightning, or Jump) damage, and if the target is weak (2x) or resistant (0x) to that element
- Whether or not the Timed Hit or Timed Block was done correctly, for attacks where this is applicable. (All A attacks and some Y attacks fall under this category, and all blocks for regular enemy attacks and some special attacks do as well.) (Note the timed hits database is incomplete, please contact Pidge/BOX BOY if you would like to help with it. You do not need any special equipment to contribute.)
- Damage rolls, but only when you are the attacker, and using an A-attack with a weapon equip. Each weapon has its own RNG range. There is no RNG otherwise in any damage calculation, besides a random chance for an attack to miss.
- There are also offense items that do a set amount of damage, which is increased or decreased based on boost multipliers and elements.
Turn Order
There is no ATB system in this game. All actors on the field go once during a turn (if an enemy attacks more than once, they used a counter-attack). Your speed stats determine the order in which everyone goes.
In the event of a speed tie between party members, the turn order goes as follows:
- 3-way tie: Right > Middle > Left
- Middle and right tie: Middle > Right
- Left and right tie: Right > Left
- Left and middle tie: Middle > Left
Status Effects & KO
There are seven status effects, all of which disappear after 3 turns:
- Mushroom - cannot choose any actions, heals a small amount, increases defenses
- Scarecrow - can only use magic attacks
- Mute - cannot use magic attacks
- Poison - take damage every turn
- Fear - multiplier to cut attack and defense cut in half
- Sleep - cannot choose any actions, but will wake up if hit by a regular attack
- Berserk - cannot choose any actions, randomly attack your party
Status effects are also cured at the end of a battle. KO is also cured at the end of the battle (character is revived with 1 hp). KO is also cured during battles where the party moves from one battlefield to another (King Calamari, Cloaker/Domino, Smithy).
Mute, Poison, Fear, and Sleep can be cast on some enemies. The spell Psychopath will show you what status effects can be used on an enemy. Scroll to the Spells section for information on how to read the symbols in these descriptions.
Freebies
When using any single-use item in battle, there is a chance the item will “Freebie”. This means that you get an extra copy of that item put back in your inventory after you use it. Most items have a 25% chance of this happening, but some (like the Red Essence) are lower.
EXP and spoils
The EXP shown at the end of the battle is the amount given to each recruited character (including any who were not used in the fight).
EXP can only be manipulated by using the Exp. Booster accessory, which doubles the amount the wearer receives.
Battles can also grant you coins, and drop up to 1 item shown in the EXP/coin dialog.
Spells
Your Spells
This is a list of all the spells your party can learn, and what they do. The base power and FP cost of a spell can be randomized, and therefore will not be listed here.
- Bowser Crush - Damages all enemies. Mash any of the A, X, Y, or B buttons to increase your damage output (up to 16 button presses are counted). Mashes do not have to be timed or spaced out in any way.
- Come Back - Revives one KO’ed party member. The timed hit for this has not been documented yet, but when timed correctly, the party member receives a full HP heal in addition to being revived.
- Crusher - Damages one enemy. The timed hit for this has not been documented yet.
- Fire Orb - Fire-elemental attack that can be used up to 18 times with correct mashing. You do not want to mash this as fast as possible; mashes should be about 8 frames apart for maximum output.
- Geno Beam - Damages one enemy. Hold the Y button until you see 3 stationary stars in your gauge for maximum output.
- Geno Blast - Damages all enemies. Hold the Y button until you see 3 stationary stars in your gauge for maximum output.
- Geno Boost - Adds the 1.5x boost multiplier status to one party member’s attack & magic attack (and defense & magic defense if the timed hit is done). This also affects their item damage.
- Geno Flash - Damages all enemies. Hold the Y button until you see 3 stationary stars in your gauge for maximum output.
- Geno Whirl - Damages one enemy, is a OHKO if timed correctly AND the enemy is not immune to OHKO.
- Group Hug - Heals all party members’ HP and removes all status effects. The timed hit window for this has not been documented yet. Can be used in non-battle X menu as well. Removes the invincibility from Red Essence due to a casting bug in the vanilla game.
- HP Rain - Heals one party member’s HP. The timed hit window for this has not been documented yet. Can be used in non-battle X menu as well.
- Jump - Does a single Jump-elemental attack. The game keeps a counter of how many times you have used this attack since the start of your save file, and as that number increases, so does the attack’s power.
- Mute - Attempts to cast the Mute status on all enemies. 3 X’s will fall over them if they receive the status. Accepts up to 26 D-pad inputs to increase its efficacy.
- Poison Gas - Damages all enemies, and attempts to cast the Poison status on them. A gas cloud will appear over their head if they receive the status. Accepts up to 16 D-pad inputs to increase its output.
- Psych Bomb - Damages all enemies. Mash any of the A, X, Y, or B buttons to increase your damage output (up to 16 button presses are counted). Mashes do not have to be timed or spaced out in any way.
-
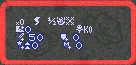
Psychopath - Tells you the elements that an enemy is weak or immune to, and the
status effects that it is susceptible to. Messages will look something like this:


Elements following the () symbol indicate the enemy's immunities (0 damage), and elements following the () symbol indicate weaknesses (2x damage).
- - Fire
- - Ice
- - Lightning
- - Jump
- - Mute
- - Sleep (Sleepy Time, Sleepy Bomb)
- - Poison (Poison Gas, Bad Mushroom)
- - Fear (Terrorize, Fright Bomb)
- - Instant Death (Geno Whirl)
Other times, the message will be blank. This means the boss has no elemental weaknesses or immunities, and cannot be affected by OHKO or any status effects. - Shocker - Does a Lightning-elemental attack to one enemy.
- Sleepy Time - Attempts to cast the Sleep status on all enemies. A “zzz” will appear over their head if they receive the status, and they will stop moving. Accepts up to 28 D-pad inputs to increase its efficacy.
- Snowy - Does Ice-elemental damage to all enemies on the field. Accepts up to 8 D-pad inputs to increase its output.
- Star Rain - Does damage to all enemies on the field. Can be chained with a timed hit up to 16 times. The timed hit window for this has not been documented yet.
- Super Flame - Fire-elemental attack that can be used up to 20 times with correct mashing. You do not want to mash this as fast as possible; mashes should be about 8 frames apart for maximum output.
- Super Jump - Does one base Jump-elemental attack, and then up to 100 more weaker Jump-elemental attacks if timed correctly. After the 13th jump, this is reduced to a 3 frame window. You can receive a special item for achieving 30, and a special item for achieving 100. This is incredibly difficult to do on anything other than an original SNES or Wii virtual console, but there are tutorials here if you’re interested in learning it.
- Terrorize - Damages all enemies, and attempts to cast the Fear status on them. A “!” will appear over their head if they receive the status. Accepts up to 16 D-pad inputs to increase its output.
- Therapy - Heals one party member’s HP and removes all status effects. The timed hit window for this has not been documented yet. Can be used in non-battle X menu as well.
- Thunderbolt - Does a Lightning-elemental attack to all enemies on the field.
- Ultra Flame - Fire-elemental attack that can be used up to 18 times with correct mashing, but each hit will land on randomly selected enemy targets. You do not want to mash this as fast as possible; mashes should be about 8 frames apart for maximum output.
- Ultra Jump - Does one base Jump-elemental attack, and then up to 100 more weaker Jump-elemental attacks if timed correctly, but on randomly selected enemy targets. After the 18th jump, this is reduced to a 2 frame window. This is incredibly difficult to do on anything other than an original SNES or Wii virtual console.
Spell Swapping
You can use EXP stars to have party members learn spells that belong to another party member's spell set. This is something of an "advanced" tech, but is good to know about.
Press X while you are jumping under an EXP star chest to hit it, and open your menu. Go to the Switch menu, and swap the character who you want to teach a spell to, with the character that already knows the spell. If the first character is about to hit the level that the second character learned the spell at, they will learn that spell during the EXP star.
Example: If Mallow naturally learns Shocker at Level 10, and Peach hits level 10 during an EXP star, you can swap Peach and Mallow to have Peach learn Shocker at Level 10.
This isn't often used during the randomizer as it takes some setup, but can be quite useful in the right circumstances.
For more information, this page includes a video demonstration.
Enemy Spells
This is a list of all the spells enemies can use. The base power and status afflictions can be randomized, and therefore will not be listed here. Damage is calculated based on their Magic attack and your Magic defense.
Single-target damage spells:
- Damage only: Blast, Dark Star, Diamond Saw, Storm, Willy Wisp
- Fire-elemental: Drain, Flame, Flame Stone, Mega Drain
- Ice-elemental: Crystal, Ice Rock
- Lightning-elemental: Bolt, Electroshock, Lightning Orb
- Self-healing: Mega Recover, Recover, Weird Mushroom
Multi-target damage spells:
- Damage only: Arrow Rain, Big Bang, Boulder, Breaker Beam, Drain Beam, Meteor Blast, Meteor Swarm, Sledge, Spear Rain, Sword Rain, Water Blast
- Fire-elemental: Corona, Flame Wall
- Ice-elemental: Blizzard, Solidify
- Lightning-elemental: Static E!
- Status-casting: Aurora Flash, Light Beam, Petal Blast, Sand Storm
- Removes all your boost multipliers (unless protected by Red Essence): Shredder
Enemy Special Attacks
This is a list of all the special attacks enemies can use. The base power and status afflictions can be randomized, and therefore will not be listed here. All of these are single-target only. Damage is calculated based on their their Attack and your Defense.
NOTE: Some of the attacks here that don’t cast statuses have a small chance of casting a status if enemy effects are randomized.
NOTE: The timed hits database is incomplete, please contact Pidge/BOX BOY if you would like to help with it. No special equipment is needed to contribute; just a computer.
- Damage only: Backfire, Body Slam, Bombs Away, Carni-Kiss (sometimes), Chomp, Claw, Fangs, Full House, Fun & Run, Grinder, Hammer Time, Jinxed, Last Shot!, Multistrike, Pierce, Quicksilver, Skewer, Terrapunch, Triple Kick, Va Va Voom, Wild Card, (unnamed bone toss), (unnamed boulder toss), (unnamed bubble bounce), (unnamed orb shot), (unnamed hammer toss), (unnamed knife throw), (unnamed shuriken toss), (unnamed spike shot)
- Status-casting: (unnamed hammer toss)
- OHKO: Migraine, Psyche!, Scythe, Shaker, Silver Bullet
Unblockable:
- Damage only: Carni-Kiss (sometimes), Ink Blast, Loco Express, Spritz Bomb, (unnamed bomb toss), (unnamed bullet shot)
- Status-casting: Dark Claw, Deathsickle, Doom Reverb, Echofinder, Eerie Jig, Elegy, Endobubble, Flutter Hush, Funguspike, G’night, Gunk Ball, Howl, Iron Maiden, Lulla-Bye, Mush Funk, Poison, Pollen Nap, Psycho Plasm, Scream, S’crow Bell, S’crow Dust, S’scrow Fangs, S’crow Funk, Stench, Thornet, Venom Drool, Viro Plasm, (unnamed light bubble)
- OHKO: Blazer, Fear Roulette, Magnum, Sleep-Sauce, Somnus Waltz, Spore Chimes, Sporocyst
- Boost multipliers on self: Get Tough!, Valor Up, Vigor up!
How Does This Boss Work?
With the addition of the boss randomization feature, boss stats and locations will not be listed here. See the Spells/Attacks section for more information on what these spells and attacks do.
NOTE: Not all timed hits are documented, please contact Pidge/BOX BOY if you would like to help with it. No special equipment is needed to contribute; just a computer.
Axem Rangers
- This is a two-phase fight.
- Phase 1: Defeat all 5 Axem Rangers to advance. They cannot be revived by their teammates once
disabled.
- Axem Pink will usually either cast Recover or Mega Recover on a random Axem Ranger. She can also cast Petal Blast if at least 1 of her teammates is disabled. She has a 66% chance of countering magic attacks with a physical attack.
- Axem Black will either do a physical attack, or an unblockable bomb toss. He counters magic attacks with Spritz Bomb.
- Axem Red will only attack with physical moves. He will use Vigor up! on himself if 2 or more of his teammates are disabled.
- Axem Yellow will only attack with physical moves (1) (2). He will counter physical attacks with Body Slam.
- Axem Green will either do a physical attack, or cast Meteor Blast, Solidify, Static E!, or Elegy.
- Phase 2: Defeat the single-target Axem ship.
- This will only attack with Breaker Beam, but skips its turn in between casts to recharge.
Belome (1)
- Will randomly use a physical attack or Sleep Sauce. After taking enough damage, will start using S'crow Funk as well.
- On certain turns he will disable the character in the rightmost slot.
Belome (2)
- On his first turn, will pick a random character and generate a clone of them as his ally. He will also do this as a counter to being attacked if he does not already have 2 clones on the field.
- The clones can be insta-killed with Pure Water.
- If he summons clones, they must be defeated in order to finish the fight, even if Belome is dead.
- Belome attacks with a physical attack, Aurora Flash, Light Beam, or Lulla-Bye.
- Mario Clone will only ever use one physical attack.
- Mallow Clone will cast Static E!, Electroshock, Bolt, or use a physical attack.
- Geno Clone will either cast Flame Stone or use a physical attack.
- Bowser Clone will use one of two physical attacks.
- Toadstool 2 will cast Recover, Mega Recover, or use a physical attack.
Birdo
- Initially attacks with a physical.
- After you attack her 3 times, on her next turn she will shoot a single egg at you. This is unblockable unless the target is in the Defend position. When defending, the egg will ricochet and summon Eggbert; otherwise, the target will take more damage and no summon will happen.
- After the initial single egg shot, on each turn, she has a 2/3 chance of shooting an unblockable egg and a 1/3 chance of doing her physical move.
Boomer
- Starts off in his Red form, which is supposed to be weak to magic attacks. His Blue form is weak to physical attacks.
- On his turn, he will either cast Blizzard, cast Blast, cast Storm, attack with a physical, or attack Skewer.
- He changes colour every 3 of his turns.
- He also has a 33% chance of countering physical and Magic attacks with Shaker.
Booster
- This is a two-phase fight.
- Phase 1: Defeat 3 Snifits. They will either cast Static E!, cast Bolt, cast Blizzard, do a physical attack, shoot an unblockable bullet, or attack with Gunk Ball.
- Phase 2: Defeat Booster. He will either do a physical attack, attack with Spritz Bomb, or attack with Loco Express.
Bowyer
- On his first turn, he will summon 3 buttons on the ground. Every second turn, he will hit one of the
three buttons with an arrow, which disables any of your commands that use that button. This is based
on a counter system, which is set back to 0 when he locks a button:
- Physical attacks add 4.
- Magic attacks add 2.
- Items/defending do not add anything.
- If the counter is 16 or higher, he disables your physical attacks.
- If the counter is below 16 but 6 or higher, he disables your magic attacks.
- Otherwise, he disables your items.
- When he disables your regular attacks, he will also cast either Static E! or Bolt.
- When he disables your magic attacks, he will also either use a physical attack or use G'Night.
- He will not attack you in the same turn he disables your items.
- On turns where he is not locking a button, he will either use a physical attack, cast Lightning Orb, or cast Bolt.
Box Boy
- Box Boy summons Fautso on his first turn.
- Box Boy will either attack you with a physical move, attack with Carni-Kiss, or use Scream.
- Box Boy will counter magic attacks with Water Blast or Blast.
- Fautso will either use one of 3 blockable physical attacks, cast Aurora Flash, cast Boulder, or cast Meteor Blast.
Bundt & Raspberry
- This is a three-phase fight.
- Phase 1: Deplete Bundt's HP.
- The chefs will only use physical attacks. They cannot be killed.
- Bundt will not attack you in this phase.
- The chefs are removed from battle when Bundt's HP runs out and Phase 2 begins.
- Phase 2: Blow out the candles.
- You blow out a candle by using a physical attack for any amount of damage. Even if your attack misses, it will still blow out a candle.
- Magic attacks and items will not blow out candles.
- Attack Bundt when all candles are out to defeat it and advance to Phase 3.
- Bundt regenerates 1 candle on each of his turns.
- Bundt will either use a physical attack, orb attack (left) (middle) (right), use Lulla-Bye, cast Diamond Saw, or cast Blizzard.
- Raspberry is attacking you as well, but cannot be targeted. Raspberry will either use a physical attack, orb attack (left) (middle) (right), cast Sand Storm, or cast Drain Beam.
- Phase 3: Deplete Raspberry's HP.
- Raspberry will just continue to cast its spells from Phase 2.
Clerk
- Clerk will either attack you with a physical attack or an unblockable bomb.
- The Mad Mallets will only use a physical attack.
- Unlike Director and Manager, Clerk will not re-summon the Mad Mallets when they are killed.
- If a Mad Mallet is the only enemy left, it will run away from the battle.
Cloaker & Domino
- This is a two-phase fight.
- Phase 1: Defeat Cloaker or Domino.
- Phase 2 (Mad Adder):
- You can target Domino, but you only need to deplete Mad Adder's HP to finish the fight.
- Mad Adder will cast Sand Storm, Storm, Water Blast, or Boulder. There is a 10% chance it will just skip its own turn.
- Domino will cast any of Diamond Saw, Light Beam, Ice Rock, Blizzard, Solidify, or Bolt.
- Phase 2 (Earthlink):
- You can target Cloaker, but you only need to deplete Earthlink's HP to finish the fight.
- Earthlink will use a physical attack, Carni-Kiss, or Poison (cannot be blocked).
- Cloaker will use one of his Phase 1 physicals or throw a knife.
Count Down
- You must defeat Count Down and both Ding-A-Lings to complete the fight.
- You will get less EXP if Count Down is taken out before both Ding-A-Lings have died.
- Ding-A-Lings will either use a physical attack, S'crow Bell, Doom Reverb, Spore Chimes, Dark Star, Fear Roulette, or use its turn to advance Count Down's clock.
- Count Down will advance its clock on each turn and cast the spell that belongs to its clock position. It will loop these spells in order: Crystal or Ice Rock, Recover, Aurora Flash, Mega Recover, Water Blast, (do nothing), Petal Blast, Corona.
- Count Down's spells can be skipped when the Ding-A-Lings advance its clock.
Croco (1)
- Croco will either attack you with a physical or an unblockable bomb toss.
- He will cast Weird Mushroom on himself when he falls below a set HP.
Croco (2)
- This is a two-phase fight.
- Phase 1: Croco will either attack you with a physical or an unblockable bomb toss.
- Phase 2: After losing enough HP, Croco steals all your items, and then will only attack you with a physical or Chomp.
Culex
- Culex will summon Fire Crystal, Water Crystal, Earth Crystal, and Wind Crystal on his first turn.
- You do not need to attack the crystals, but you can choose to do so if they're giving you trouble. They automatically die when Culex does.
- Culex casts Shredder every third turn. Otherwise, he will either do a physical attack, cast Flame Stone, cast Dark Star, or cast Meteor Blast.
- Fire Crystal casts Drain, Flame, Mega Drain, Flame Wall, or Corona.
- Water Crystal casts Crystal, Diamond Saw, Ice Rock, Blizzard, or Solidify.
- Earth Crystal casts Blast, Storm, Sand Storm, Water Blast, or Boulder.
- Wind Crystal casts Lightning Orb, Bolt, Electroshock, Static E!, Light Beam, or Petal Blast.
Czar Dragon & Zombone
- This is a two-phase fight.
- Phase 1: Defeat Czar Dragon.
- Czar Dragon may cast Water Blast or Flame Wall on his turn. If it uses a physical attack or Iron Maiden instead, it will also summon Helios.
- Helios self-destruct by blasting themselves into you.
- Czar Dragon has a 33% chance of countering any damage with a physical attack.
- Phase 2: Defeat Zombone.
- Zombone's first attack is always Boulder.
- On the rest of its turns, it will either cast Blast, Storm, Boulder, Scream, or use a physical attack.
- Zombone will attack itself once if you use Pure Water on it.
- Zombone has a 33% chance of countering any damage with a physical attack.
Director
- Director will either attack you with a physical attack, an unblockable bomb, or Spritz Bomb.
- Director has a 33% chance of countering any attacks with his physical attack.
- Director will increase his attack and defense power the first time all the Poundettes are killed.
- Director will re-summon the Poundettes when they are all killed.
- The Poundettes will use a physical attack, or a hammer toss that sometimes inflicts a status.
Dodo (solo)
- Dodo will either use a physical attack, Multistrike, or Flutter Hush.
- Dodo has a 33% chance of countering any damage with a physical attack.
Exor
- You do not need to defeat both eyes and Neosquid to finish this fight. Only Exor needs to be defeated.
- Exor is immune to all damage until one of the two eyes has been disabled. Then, you can deal damage to it, including Geno Whirl OHKO.
- Both eyes and Neosquid can be disabled by running out of HP, but they will be resurrected after 2-3 turns.
- The Left Eye can attack with a physical, Gunk Ball, Venom Drool, or S'crow Bell.
- The Right Eye can cast Bolt, Diamond Saw, Mega Drain, Flame Stone, Dark Star, or Blast.
- Neosquid can use Solidify, Aurora Flash, Corona, Static E!, Flame Wall, Water Blast, Carni-Kiss, Lullabye, or a physical.
- Exor will not attack.
Gunyolk & Factory Chief
- Gunyolk will use Breaker Beam every second turn.
- On its other turns, Gunyolk will use physical attacks, Echofinder, Mega Drain, or Electroshock.
- Factory Chief will either use one of two physical attacks, Funguspike, or Thornet.
Hammer Bros
- Hammer Bros will only attack with a physical attack or Hammer Time.
- When one Hammer Bro dies, the other will cast Valor Up.
Hidon
- Hidon summons four Goombettes on any turn where it is the only enemy on the field.
- Hidon will attack with Static E!, Willy Wisp, or Flame Stone.
- Hidon will counter physical attacks with either a physical attack or Carni-Kiss.
- Goombettes will only use a physical attack.
Jagger
- Jagger will attack with physical attacks or Terrapunch.
- He has a 33% chance of countering any damage with Terrapunch as well.
Jinx
- Jinx will attack with Jinxed or Triple Kick (1) (2).
- He will use Valor Up when his hp gets low enough.
- He has a 33% chance to counter all damage with Jinxed.
Jinx (2)
- Jinx's first attack will be Quicksilver (1) (2).
- He will attack on the rest of his turns with Jinxed, Triple Kick (1) (2), Quicksilver (1) (2), or Silver Bullet.
- He will use Valor Up when his hp gets low enough.
- He has a 33% chance to counter all damage with Triple Kick (1) (2).
Jinx (3)
- Jinx's first attack will be Bombs Away.
- He will attack on the rest of his turns with Jinxed, Triple Kick (1) (2), Quicksilver (1) (2), Silver Bullet, or Bombs Away.
- He will use Valor Up when his hp gets low enough.
- He has a 33% chance to counter all damage with Quicksilver (1) (2).
Johnny Jones
- When Bandana Blues are alive, Johnny will only attack you with a physical attack.
- Bandana Blues will attack you with physical attacks and Pierce.
- Johnny will use Get Tough! when his hp falls low enough.
- You do not need to kill the Bandana Blues to finish the fight. They will vanish when Johnny is defeated.
- If you kill all the Bandana Blues, Johnny will take the character in your left slot to a 1v1 battle.
- In the 1v1, Johnny can use his physical attack, Skewer, Diamond Saw, or Mega Drain. He has a 14% chance of skipping his turn.
- You will receive less EXP if you do the 1v1 phase.
King Calamari
- This is a three-phase fight. In the first two phases, you fight a total of 3 left and 3 right tentacles.
- In the final phase, you fight a right tentacle, a left tentacle, and King Calamari.
- The tentacles either use physical attacks (1) (2) or throw a character offstage for a turn, giving them the Fear status.
- King Calamari will either use a physical attack or cast Ink Blast, Venom Drool, Sand Storm, or Drain Beam.
Knife Guy & Grate Guy
- Initially, Knife Guy will only use a physical attack or a knife throw, and Grate Guy will either use a physical attack, Echofinder, or a tiny sleep bubble.
- After 3 turns, they will enter their team formation. In this form, Knife Guy will always cast Blizzard or Crystal, and Grate Guy will always cast Meteor Blast.
- They will separate after being hit 5 times.
Mack
- On Mack's attack turns, if there are any Bodyguards on the field, he will either do a physical attack or cast Flame or Flame Wall. He will not use physical attacks if there are no Bodyguards.
- On every third turn, if there are any Bodyguards on the field, Mack will exit the fight until the Bodyguards are defeated.
- On every fifth turn, if there are no Bodyguards on the field, Mack will summon four of them.
- Mack will skip a turn if hit by the Thunderbolt spell.
- Bodyguards will either use a physical attack, cast Drain, or skip their turn.
- When Mack is defeated, any remaining Bodyguards must be defeated in order to finish the fight.
Magikoopa
- Magikoopa can cast Bolt, Blast, Willy Wisp, Water Blast, Solidify, or Flame Wall.
- If Magikoopa does not have a summon on the field, he will summon Bahamutt, Jinx Clone, or King Bomb. When a summon is active, Magikoopa cannot be targeted.
- Bahamutt uses physical attacks, Flame Wall, Flame, Drain, and Iron Maiden.
- Jinx Clone attacks with Jinxed, Triple Kick (1) (2), Quicksilver (1) (2), Silver Bullet, or Bombs Away.
- King Bomb does nothing for 3 turns, and then self destructs with Big Bang if you don't kill it first. If you survive Big Bang, Magikoopa will be completely disabled for the remainder of the fight, and you just deplete his HP to win.
Manager
- Manager will either attack you with a physical attack, an unblockable bomb, or Spritz Bomb.
- Manager has a 33% chance of countering any attacks with his physical attack.
- Manager will re-summon the Pounders when they are all killed.
- The Pounders will always attack with a physical attack or a hammer toss.
Megasmilax
- This is a four-phase fight. In the first three phases, you fight a total of 6 Smilaxes.
- In the final phase, you fight two Smilaxes and Megasmilax.
- The smilaxes either use physical attacks, Pollen Nap, Drain, or Flame.
- Megasmilax will always use Petal Blast on its first turn, and then every fourth turn.
- On its other turns, Megasmilax will either use physical attacks, S'crow Dust, Drain, or Flame Wall.
- Smilaxes have a 33% chance of countering physical attacks with a physical attack.
- Megasmilax has a 33% chance of countering physical attacks with a physical attack.
Pandorite
- Pandorite will use Flame Wall or Flame on odd turns, and Carni Kiss, Scream, or a physical attack on even turns.
Punchinello
- Punchinello will summon Micro Bombs, Bob-Ombs, or Mezzo Bombs depending on how much HP he has left.
- The bombs either skip their turn, or self-destruct by running into you.
- Punchinello will either use a physical attack or cast Sandstorm.
- If there are no bombs left, Punchinello skips his attack turn to summon them.
Valentina & Dodo
- This is a two-phase fight.
- Phase 1: Deal 40% of Dodo's health.
- The character in your middle slot will be taken away to 1v1 Dodo.
- Dodo will either use a physical attack, Multistrike, or Flutter Hush.
- Dodo has a 33% chance of countering any damage with a physical attack.
- Phase 2 begins when you deplete 40% of Dodo's HP.
- Phase 2: Defeat Valentina.
- Initially, your two remaining party members fight Valentina on her own.
- After you deal enough damage, Dodo and your middle party member return to the fight.
- Valentina can use a physical attack, Petal Blast, Aurora Flash, Light Beam, Solidify, Drain Beam, Diamond Saw, Water Blast, Blizzard, or Crystal.
Yaridovich
- Yaridovich's first spell is always Water Blast.
- When Yaridovich is alone, he casts Flame Stone, Willy Wisp, and Water Blast.
- After 4 turns, Yaridovich will summon a clone of himself.
- When the clone is on the field, Yaridovich will use physical attacks (1) (2) or Pierce.
- The clone casts Meteor Blast, Static E!, and Bolt.
- Your cursor will automatically target the real Yaridovich, unless you move it while the clone is on the field. The clone also takes significantly more damage.
- The clone automatically disappears after three turns, and disappears when the real Yaridovich is killed.
Leveling Up
Battles will give you EXP, but there is a definite tradeoff between skipping fights for speed and being too weak to complete the final dungeon.
If you have access to the factory and fast/high damage output, you can fight Ameboids before they multiply for ~17 exp.
The game also offers invincibility stars in chests, which allow you to run around an area knocking out as many enemies as you can in a time limit. Every hit will give you an EXP amount determined by the chest itself.
By default (without the EXP challenge turned on), chests generally trend toward giving you more EXP the further along the world map you progress. Anyone with the EXP booster equipped of course will receive 2x the experience from these stars.
The game also has a technique called Death Abuse. When you game over, as long as you don’t reset your console, once you respawn at your last save, everything will be reloaded according to the state of the world at your last save -- except your party members will still have the levels and EXP they had when you died. This means you can remove all your equipment, save before a star, do the star, get into an encounter, intentionally lose, and respawn to do the star again, in order to farm levels. This is known as “Death Abusing”.
At each level, your character will be granted stat bonuses. On top of that, you can choose one of three stat sets (attack & defense, HP, or magic attack & magic defense) to give an additional bonus to.
Getting Items & Equipment
There are a total of 22 shop locations. 14-15 are fully available from the start (1 of which is permanently missable), 6-7 are locked behind quests, and 1 progressively changes based on your key items.
The cap on normal coins has been increased to 9999.
Some chests are hidden. Chests may have an item, coins, a frog coin, a free party heal, an EXP-granting invincibility star, a boss battle, or increase your total Flower Points. (Or, they may be empty...)
Some items are also presented to you from sidequests (defeating certain bosses, returning key items, etc).
Some items are granted to you at the end of a battle when dismissing the EXP window. These are usually consumables (will not be a key item).
What Equips Do
Equipment can either be a Weapon, Armor, or Accessory.
Hovering over a piece of equipment in a menu will show you information about what that equip does. All menu descriptions for weapons, armor, and accessories will look like something like this:
First Row
Lists elements that the equip makes you immune () to, and elements that you will take half damage () from. If this row is blank, that means the equipment does not offer any fire/ice/lightning protections.
- - Fire
- - Ice
- - Lightning
Second Row
Lists the amount by which your agility increases () or decreases (), and status effects that the equip provides immunity to. If this row only shows the agility stat, that means the equipment does not offer any status immunities.
- - Mute
- - Sleep
- - Poison
- - Fear
- - Mushroom
- - Scarecrow
- - Instant Death
- - Berserk (exists but unused in the original game code, is used in the randomizer)
Third Row
Physical attack increase () or decrease (), and physical defense increase () or decrease ().
indicates that the stat is also given a boost multiplier (like what Geno Boost, Bracer, Power Blast, etc. gives you).
Fourth Row
Magic attack increase () or decrease (), and magic defense increase () or decrease ().
Like with the third row, indicates that the stat is also given a boost multiplier.
Some equipment can only be equipped to certain characters. This can be randomized. However, you will not be able to see if a character can or cannot equip an item if they have not been recruited yet.
The sum of your equip stats can sometimes put your character's stat below 0. This will look glitched, like Peach's Magic Defense in this screenshot:
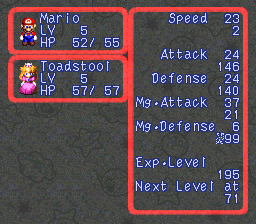
Effectively, while this is supposed to convey a negative number, their stat is functionally treated as 0.
While the game will tell you most of the effects that each piece of equipment has, there are some that have inherent special effects that are never randomized. These are:
- B’tub Ring - If you have this equipped, the wearer can use the Mystery Egg item 10 times to obtain the Lamb’s Lure item.
- Coin Trick - If equipped, you will receive twice the usual amount of coins in a battle.
- Exp. Booster - The wearer will receive twice the stated amount of EXP from a battle.
- Jump Shoes - If you have this equipped, all of the wearer’s Jump attacks bypass enemies’ Jump element immunities.
- Scrooge Ring - The wearer’s magic attacks will only use half their regular MP cost.
- Signal Ring - If someone in the active party has this equipped, it will play a noise if you enter a room that has an invisible chest in it.
What Regular Items Do
Healing Items
These can be used in battle or on the field. Cannot be used on enemies.
- Moldy Mush - 1 HP to single target
- Rotten Mush - 5 HP to single target
- Wilt Shroom - 10 HP to single target
- Mushroom - 30 HP to single target; if “but…” is in the item description, it will also give the target the Mushroom status
- Mid Mushroom - 80 HP to single target
- Yoshi Candy - 100 HP to single target
- Max Mushroom - 255 (max) HP to single target
- FroggieDrink - 30 HP to whole party
- Muku Cookie - 69 HP (nice) to whole party, cures status effects
- Elixir - 80 HP to whole party
- Megalixir - 150 HP to whole party
- KerokeroCola - All HP to whole party, and all FP
- Honey Syrup - 10 FP
- Maple Syrup - 40 FP
- Royal Syrup - 99 (max) FP
- Pick Me Up - Revives a single KOed target to full HP
- Able Juice - Removes all negative status effects from target
- Freshen Up - Removes all negative status effects from whole party
Buffing Items
These can be used in battle only. Cannot be used on enemies.
- Energizer - 1.5x boost multiplier to single target’s attack and magic attack
- Bracer - 1.5x boost multiplier to single target’s defense and magic defense
- Yoshi-ade - 1.5x boost multiplier to single target’s attack, magic attack, defense, and magic defense
- Power Blast - 1.5x boost multiplier to whole party’s attack and magic attack
- Crystalline - 1.5x boost multiplier to whole party’s defense and magic defense
- Red Essence - Complete invincibility for 3 turns. Protects against Shredder. Removed by Group Hug due to a casting bug in the vanilla game.
Offense Items
These can be used on enemies. All damage-dealing items are affected by boost multipliers as well as elemental weaknesses and resistances, the numbers here are the base amount assuming no multipliers.
- Bad Mushroom - Deals 50 damage to single target and inflicts the Poison status
- Fright Bomb - Deals 100 damage to single target and inflicts the Fear status
- Fire Bomb - Deals 120 Fire-elemental damage to all enemies
- Ice Bomb - Deals 140 Ice-elemental damage to all enemies
- Lamb’s Lure - Attempts to remove one enemy from battle (you do not receive coins/experience for the removed enemy). Use 48 times to obtain the Sheep Attack.
- Pure Water - OHKO on undead enemies
- Rock Candy - Deals 200 damage to all enemies
- Sheep Attack - Attempts to remove all enemies from battle (you do not receive coins/experience for the removed enemies).
- Sleepy Bomb - Does not deal damage, but inflicts the Sleep status on all enemies.
- Star Egg - Deals 100 damage to all enemies. Reusable.
- Yoshi Cookie - Yoshi appears and attempts to turn the enemy into an item, or give the party a Yoshi Candy. This is also a field item.
Other Battle Items
- EarlierTimes - Restarts the current battle. Reusable.
- Goodie Bag - Gives you 1 coin. Reusable.
- Lucky Jewel - You will get the Lucky! minigame at the end of the battle. Can be used 10 times, then it disappears.
- Mystery Egg - If someone has the B’Tub Ring equipped, they can use this 10 times to obtain the Lamb’s Lure.
- See Ya - Instantly runs from battles. Reusable.
Field Items
Items that are not used in battle, but are not Key Items.
- Bright Card - Gives you access to Grate Guy’s Casino.
- Carbo Cookie - Give this to the girl on the bucket in Moleville for access to Midas River. The second time, she will give you a Frog Coin.
- Fertilizer - Regular item if not included in the Key Item shuffle. Trade this and the Seed to the Rose Town gardener for an equip and a weapon.
- Fireworks - After completing the Moleville Mines, trade to the girl with the pink bow outside in Moleville for a Shiny Stone. If you buy 3 of these, the ending credits will show flower fireworks; if you buy five, it will be star fireworks.
- Flower Box - Increases max FP by 5, heals all FP.
- Flower Jar - Increases max FP by 3, heals all FP.
- Flower Tab - Increases max FP by 1, heals all FP.
- Seed - Regular item if not included in the Key Item shuffle. Trade this and the Fertilizer to the Rose Town gardener for an equip and a weapon.
- Shiny Stone - Unseals the door to the Culex fight in Monstro Town.
- Wallet - Trade this to a guy walking outside in Mushroom Kingdom to get a Flower Tab (and a Frog Coin, if returned after completing Marrymore).
- Yoshi Cookie - Can use these to gamble on the races in Yoshi’s Island. Also an offense item.
What Key Items Do
Key items can be found in a set number of locations, and are randomized within each other. See the “Where Key Items Are” section to find out where to find them.
- Alto Card - Unlocks more items in the Tadpole Pond coin shop.
- Bambino Bomb - Unlocks the second half of Moleville Mines for a boss fight and the minecart minigame.
- Big Boo Flag - Trade in to the Monstro Town Inn with the Dry Bones Flag and Greaper Flag for an equip.
- Castle Key 1 - Unlocks the first locked door in Nimbus Castle for a boss fight.
- Castle Key 2 - Unlocks the second locked door in Nimbus Castle to lead to a boss fight.
- Cricket Jam - Trade in to Frogfucius in Tadpole Pond for 10 Frog Coins.
- Cricket Pie - Trade in to Frogfucius in Tadpole Pond for an equip.
- Dry Bones Flag - Trade in to the Monstro Town Inn with the Big Boo Flag and Greaper Flag for an equip.
- Elder Key - Opens the door in Booster’s Tower portrait room (contains a weapon).
- Fertilizer - Regular item if not included in the Key Item shuffle. Trade this and the Seed to the Rose Town gardener for an equip and a weapon.
- Greaper Flag - Trade in to the Monstro Town Inn with the Dry Bones Flag and Big Boo Flag for an equip.
- RareFrogCoin - Trade in to the Mushroom Kingdom shop for another key item.
- Room Key - Opens the door in Booster’s Tower checkerboard room (contains a chest).
- Seed - Regular item if not included in the Key Item shuffle. Trade this and the Fertilizer to the Rose Town gardener for an equip and a weapon.
- Shed Key - Opens the locked shed in Seaside Town; unlocks the rest of the Seaside Town shops.
- Soprano Card - Unlocks more items in the Tadpole Pond coin shop.
- Temple Key - Gets past the Belome statue in Belome Temple (blocks the doorway down the elevator if you get the “Sorry, I’m not accepting visitors past my bedtime” fortune). Contains Frog Coins, flowers, and some battle items.
- Tenor Card - Unlocks more items in the Tadpole Pond coin shop.
Where Key Items Are
- Mario’s Pad - Press A on the corner of the bed.
- Mushroom Kingdom - Trade in the RareFrogCoin.
- Bandit’s Way - Defeat the boss.
- Tadpole Pond - Perform song So La Mi Re Do Re Do Re (5 4 0 1 2 1 2 1)
- Tadpole Pond - After finishing the minecart minigame, perform song Mi Do So Do Re La Ti Do (0 2 5 2 1 4 3 2)
- Tadpole Pond - After beating the Land’s End boss, perform song La Ti Do Re So Do Re Mi (4 3 2 1 5 2 1 0)
- Rose Town - Press A on the right side of the wooden town flower sign.
- Yo’ster Isle - Press A between “O” and “A” on the race goalpoint.
- Moleville Mines - Defeat the first boss.
- Booster’s Tower 2nd portrait hall - Talk to the portraits in order (6-5-3-1-2-4).
- Booster’s Tower Checkerboard Room - Grab the key sprite in the checkerboard room.
- Booster's Tower Knife Guy Minigame - Complete the minigame once after defeating the Knife Guy/Grate Guy boss location.
- Seaside Town - Defeat the boss.
- Land’s End - Go down the cave in the Sky Bridge room, knock over the barrel near the trampoline, and the trampoline will transport you to Kero Sewers. Jump to the left and grab the chest.
- Bean Valley - Defeat the last boss and wait around a few seconds before leaving the room. (only when Seed/Fertilizer are included in Key Item shuffle)
- Monstro Town - Talk to the Thwomp 7 times and walk outside.
- Nimbus Land - Talk to the castle guard near the save point in the left branch.
- Nimbus Land - Defeat the first boss in the castle, behind Castle Key 1.
- Nimbus Land - Defeat the final boss (behind Castle Key 2), and walk off the right side of the main outdoor area of Nimbus Land into an invisible path. (only when Seed/Fertilizer are included in Key Item shuffle)
What Can I Do In This Town?
Click on a location name for a map showing navigation, chests, and boss fights.
Area 1
Mario's Pad (map)
- Can heal for free by turning off the lamp.
- Press A at the bed corner for a key item.
Mushroom Way (map)
- You can choose to rescue Toad for some small item rewards.
- One boss fight at the end that gives you an equip.
Mushroom Kingdom (map)
- There is one shop here. Sells items and equips.
- You can turn in the RareFrogCoin to the shop for another key item.
- The frog coin chest has been moved to the top right corner.
- You can access the castle vault chests immediately.
- Mushroom Kingdom becomes occupied after you complete Bandit’s Way, at which point a boss fight in the throne room will be available.
- While occupied, you can get the three vault chests again, retrieve an equip from the Toad in the guest room, heal for free in Peach’s room, and retrieve reward items by rescuing people in town and in the castle.
- Defeating or skipping the boss returns Mushroom Kingdom to its unoccupied state. (Skipping the boss will still grant you the Star Piece if it has one.)
- If you have the Wallet, you can turn it in to a blue Toad for a reward. Do this after Marrymore to get a Frog Coin in addition to the reward.
Bandit's Way (map)
- 1 boss fight.
- You can attempt Doge Jump if you like, but if you don’t know this, don’t worry about it.
- You must sneak up on the enemy from behind 3 times to start the fight (if they don’t shake and turn around, it doesn’t count).
- Defeating the boss nets you a key item and a regular item.
- Defeating the boss switches Mushroom Kingdom to its occupied state.
Area 2
Kero Sewers (map)
- One mimic chest and one boss fight, each may have a star piece.
- The mimic chest transforms into a 50 coin chest if you reload the room after defeating it.
- Press the green switch to drain the water, as the underwater pipe leads to the boss.
- The chest marked “Cricket Jam” on the linked map will give you a random key item if you come here after pushing the barrel over in the Land's End cave passage; otherwise it will give you a flower.
- When you defeat the boss, you can exit instead of doing Midas River.
Midas River (map)
- Obstacle course minigame.
- You can’t keep any of the regular coins you find here, but you can trade 60 in for a Frog Coin.
- The toad gives you a weapon.
Tadpole Pond (map)
- The left shop only accepts Frog Coins. Sells all types of equips and items.
- The right shop sells items, accepts normal coins, and adds more items for sale when you obtain the Alto, Tenor, and Soprano Card key items.
- Turn in the Cricket Pie to Frogfucius for a weapon.
- Turn in the Cricket Jam to Frogfucius for 10 frog coins.
- In Melody Bay, perform song So La Mi Re Do Re Do Re (5 4 0 1 2 1 2 1) for a key item.
- In Melody Bay, perform song Mi Do So Do Re La Ti Do (0 2 5 2 1 4 3 2) for a key item after completing the minecart minigame in Moleville.
- In Melody Bay, perform song La Ti Do Re So Do Re Mi (4 3 2 1 5 2 1 0) for a key item after defeating the boss of Land’s End.
Rose Way(map)
- No bosses or shops.
- Mostly just minor spoils here.
Rose Town (map)
- 2 shops here (one selling items, one selling equips).
- You can get a key item by pressing A on the right side of the “Welcome” sign.
- While the town is occupied, you can sleep in the inn for a free item.
- If you let the guy back into his house in the top left corner, your actions/answers will change the contents of some chests in Forest Maze.
- The gardener’s house is unlocked after completing Marrymore, and then you can turn in the Seed and the Fertilizer to get access to the equip chests above his house.
Forest Maze (map)
- You can perform Wiggler Jump to obtain coins and frog coins.
- The contents of the group of 5 underground chests change depending on actions you took in Rose Town.
- See the map for information on how to complete the maze section.
- After defeating the area boss, you recruit a new character.
Pipe Vault (map)
- Completing this area unlocks Yo’ster Isle.
- The mole with the 4 pipes is the Goomba Thumpin’ minigame, which can get you item rewards and Frog Coins.
- You can get the Frog Coin under the post near the trampoline by running toward it and pressing down at the end.
Yo’ster Isle (map)
- Press A between “O” and “A” on the goalpost to get a key item.
- You can beat Boshi in a race here to unlock the Yoshi Race minigame.
- Talk to one of the pink Yoshis to get 3 cookies if you have none, and then you can gamble cookies in the race minigame to get more of them.
- You can feed cookies to the baby Yoshi to turn it into Fat Yoshi.
- If you give Fat Yoshi 21+ cookies at once, you may get rare items like Yoshi-Ade and Red Essence.
Area 3
Moleville (map) / Mines (map)
- 1 shop here (sells items and equips).
- 2 boss fights in the mines.
- Defeat the first boss for a key item.
- If you have the Bambino Bomb, take it to the mole halfway through the mines to unlock the rest of the mines, where there is another boss as well as the minecart minigame.
- If you run along the long tracks in the star chest room, you will get a Frog Coin.
- See the bottom of this page for tips and tutorials on completing the minecart minigame quickly.
- Completing the minecart minigame allows you to perform the second song in Tadpole Pond for a key item, and also allows you to buy Fireworks from the mole in the upper left house.
- You can climb up to the top of the mountain from the outside after completing the Mines to play the minecart minigame again. You can choose to wager some coins and win extra if you beat your best time.
- Trade Fireworks to the girl with the pink bow outside in town to receive the Shiny Stone, which unlocks Culex’s lair in Monstro Town.
- At various points in the game, the blue Toad in the shop will sell you the Mystery Egg, Lucky Jewel, and Frying Pan.
Booster Pass (map)
- Talk to the 2nd bush near the entrance marked “Start” on the map to receive a frog coin.
- The area in the top left of the first room will open after hitting the green switch in Booster Tower.
- The green switch in the second room transforms the enemies into coins.
- Some of the bushes are enemy encounters.
Booster Tower (map)
- To get the equip chest with the seesaw, walk (don’t run) off the center of the platform.
- The green switch opens up part of Booster Pass, containing more chests.
- If you have the Elder Key, you can open the locked door in the second portrait room to get an equip.
- You can talk to the portraits in the order indicated on the map image to get a key item.
- To avoid hidden encounters in the checkerboard room, do not step on any of the red squares in this image.
- Grab the key sprite in the checkerboard room for a key item.
- If you have the Room Key, you can open the locked door in the checkerboard room for an equip.
- If you complete the curtain minigame at the top of the tower successfully, you will receive an equip and can choose to do a boss fight after; if you fail it 3 times, you will immediately do the boss fight.
- There is another boss fight on the balcony.
- You do not need to do Booster Hill after finishing.
- You can come back to the tower later to get a regular item from Knife Guy in a stairway.
Booster Hill
- Minigame.
- Bounce off the barrels and Snifits to grab flowers from Peach.
Marrymore (map)
- There is a shop in the hotel selling items and equips.
- Complete the boss fight in the chapel to recruit a new character.
- If you stay in the hotel suite and overstay your visit, you must work for the hotel to make up for it. You can receive items and coins as tips from guests.
- If you stay in the hotel suite multiple times, you may get rewards from the hotel.
Area 4
Star Hill (map)
- Talk to the green flowers to open the door to the next room.
- Check the top right corner of the final room to see if a star piece is there.
Seaside Town
- The left 3-door building has a shop in the leftmost door while the town is initially occupied. This shop sells items only and becomes permanently inaccessible after Sunken Ship is completed.
- There is a frog coin shop on the second level of the house at the top of the town, and the items in this shop can only be purchased once each. This shop usually sells equips, field items, and "Other" battle items.
- There is a boss fight in the second area of this town.
- After completing the boss fight, touch the nearby key sprite to get a key item.
- If you have the Shed Key, you can unlock the shed on the left side, which unlocks four more shops (items, armor, accessories, and weapons) and gives you a Flower Box. Also unlocks the Mushroom Boy shop, which you can use for farming Rock Candy, although the success rate of trading in a mushroom for a rock candy is very low.
Sea (map)
- There is a shop here that sells items and equips.
- This is also a great place to do Death Abuse when chests aren’t randomized.
Sunken Ship (map)
- There are two boss fights and a mimic chest, all of which can contain a star piece.
- After defeating the mimic chest, it becomes a 100 coin chest the next time the room is loaded.
- There is a flower behind the corner of crates in the first stairway room.
- The shop is the exact same as the shop in the Sea.
- You can get various small item prizes for completing the puzzle rooms, or you can skip them entirely and enter the password of “Pearls”.
Area 5
Land's End (map) / Belome Temple (map)
- If you take the lower path in the flower mountain room, you can access a cave in the Sky Bridge room. Wait for a puff of smoke to come out of the cave, and then jump into it. Traverse the cave and knock over a barrel before the trampoline to end up back in the Kero Sewers, where you can grab a key item out of the chest to your left.
- The Sky Bridge minigame will allow you to gamble for coins, if you decide to play it.
- In the whirlpool area, you must defeat the Shoguns in battle to advance. After beating them, you can bounce on their heads for coins and frog coins.
- If chests are not shuffled, the underground area after the whirlpools is great for death abusing, especially if you have 400 coins to spend on the second chest. After that chest is depleted, you can talk to the shaman again, and then come back later to get another star chest for 800 coins.
- In Belome Temple, you can give the Shaman on the trampoline 100 coins for quick access back to the whirlpool area.
- The order in which you hit the Belome heads will determine what item you get; the quickest/best option is left/center/right. The final fortune will either take you to a boss fight and then Monstro Town (“Mmm, I’m so hungry”) or to a treasure room (“Sorry, I’m not accepting visitors”) blocked by a statue. If you have the Temple Key, you can bypass the statue to pick up some battle items, frog coins, and flowers.
- After you’ve completed Belome Temple, you unlock the Sky Troopas minigame at the Land’s End cliff (opposite direction from Belome Temple at the whirlpools). Scale the cliff in under 12 seconds to get an equip; then scale it in under 11 seconds to get 5 Frog Coins or under 12 seconds for 1 Frog Coin.
Monstro Town (map)
- There is one shop here (items & equips).
- If you come here early, the trampoline will be missing and you cannot go through the back exit of Belome Temple.
- If you have done 30 or 100 Super Jumps, talk to the Chow to get an equip.
- Talk to the thwomp 7 times and walk outside to get a key item.
- If you have the Shiny Stone, talk to the third door to unlock a boss fight (you will receive an equip for beating it).
- If you have the three Flag key items, turn them in to the inn to get an equip.
- Go to the dojo on the upper level for four consecutive boss fights (the first and fourth ones can have Star Pieces) and to receive an equip after the fourth. You have the option to run away from these boss fights with no penalty. If you die during these fights, you will not Game Over, and can try them again.
Bean Valley (map)
- There is one mimic chest and one boss fight here.
- You must fight the Piranha Plants in the pipes if you wish to get to the underground areas.
- The hidden platform underground unlocks Grate Guy’s Casino.
- The slot chests can net you the following results:
- One of each: Box Boy encounter (will not give you a star piece)
- Two mushrooms: Full heal
- Two flowers: FP flower
- Two stars: Rock candy
- Three of anything: Frog coin
- Defeating the boss will make a note fall down onto the bushes behind the pipe, which you can inspect for a key item (or just the Seed, if the Seed is not in your key item pool).
- The brick block takes you to the vine area, which has some chests and coins and eventually takes you to Nimbus Land (already accessible from world map).
Grate Guy's Casino (map)
- You must have the Bright Card to get past the security guards.
- The slot machine in here will only reward you frog coins for 3 of a kind.
- You can play blackjack at the table.
- If you talk to Grate Guy enough times, you can play “Look the other way”, which requires only a d-pad input. If you win this 100 non-consecutive times, you obtain the Star Egg battle item. With each win you will get a random battle item, usually bad but occasionally very good.
Area 6
Nimbus Land (map)
- There is one shop here, selling items and equips.
- You can use the “Dream Cushion” at the inn for a chance at getting good items.
- Go to the house at the top left in the Nimbus Land town area, and talk to Garro. This will initiate a minigame; you can lose it twice to initiate a boss battle, or you can win it and receive an item as well as do the boss battle optionally.
- In the castle, when you come to a room that has 3 doors in a row, you can follow the left door and talk to a castle attendant to receive a key item.
- If you have Castle Key 1, you can open the middle door for another boss fight.
- Defeat the boss fight behind Castle Key 1 for another key item.
- If you have Castle Key 2, you can open the door behind the Castle Key 1 boss to unlock the third castle boss.
- After completing the castle, you can walk off the right-hand side of the outdoor area of town to receive a key item (or just the Fertilizer, if the Fertilizer is not in your key item pool) and talk to Croco in the rightmost house to get an equip.
- The top hole in the trampoline room leads to the hot springs, which is free healing and has a cliff that goes to Barrel Volcano (already accessible from world map).
Barrel Volcano (map)
- There are two shops (one item, one equip) and two boss fights in here.
- Some of the frog coins can be obtained by jumping in the lava.
- You can skip both Stumpet fights.
Area 7
Vista Hill
- A cutscene.
- Nothing else.
Bowser's Keep (map)
- Croco has two shops in here (each selling items and equips).
- You must complete 4 of the 6 red doors to advance to the bosses (you can adjust this amount with the D flag); you can manipulate the door
order to choose the ones you want by performing an easy RNG manipulation. This is not particularly useful when using the Ds flag unless you plan on revisiting, but if you opt not to use that flag, the Mario's Pad manipulation will order the doors as follows:
- Quiz, Barrel Counting, Marathon Logic Puzzle
- Coin Game, Button Game, Solitaire Puzzle - see the “Room Strategies” section on the linked page for solutions
- Gu Goomba - Shaman battle door
- Invisible floor, straight line platforms, Donkey Kong platformer door
- Z-axis platforms, cannonball maneuver, rotating platforms door
- Terra Cotta - Chester battle door (note: Chester does not have a star piece)
- If you die during the battles in the 6 doors, you do not Game Over, you are just transported back to the door lobby.
- The bosses in here may have star pieces if you chose to keep Bowser’s Keep open in your flag settings.
- If you die to any of the 3 bosses, you will be transported back to Mario’s Pad to avoid softlocking.
Factory (map)
- Unlocked when you collect all your star pieces.
- Three boss fights in total, with some forced encounters as well.
- There is one shop in here (items only).